Tuesday, December 6, 2011

How To Photograph The Not-So-Obvious

As I was walking around the historic Taos Pueblo in Taos, New Mexico, with camera and tripod in tow, I saw what most people saw: interesting, old, historic adobe residences, converted stores, traditional wooden ladders leaning against walls, etc. However, as a photo artist, I went beyond that. I was also looking for the art this interesting and intriguing place offered, both by the residents and through the unexpected juxtaposition of perspectives. To find what I found requires intuition, scanning, and extracting from the "big picture."

Most photo-worthy artistic subjects do not just jump out and hit us between the eyes to wake us up. Enjoy.


What I really liked about this scene was the
monopoly of earth-tones, with just a hint of blue

If you have any questions about these images, Taos Pueblo, blue doors, etc.
visit and contact me at www.elivega.net

Monday, September 19, 2011

How To Get Good Photographs at Zoos

When I photograph at zoos, I go into it with two overall goals: get some that look more like the animals are in a preserve and not a zoo; get some that are obviously in the zoo. In order to do that I carry a strong telephoto lenses (200mm-300mm), as well as relative wide angles (24-35mm).

Besides the decision on lenses, the number one skill you will need is patience--lots of it! If you are shooting with a DSLR, but are simply not patient, then all you're doing is taking snap shots with expensive equipment.

I like to take my tripod, yes, even when I'm shooting in broad daylight. Why? It allows me to get better compositions. I can use a lower ISO and still get sharp photos. The best way I have found is to put my camera on the tripod, but loosen all knobs to allow me to move the perspective slightly, pan if I need to as the animal is moving, and switch quickly between verticals and horizontals. Sometimes, because the action is happening so quickly, I'll go ahead a get a couple of shots without my tripod before I lose the shots. If the action is still going on, then I'll place my camera on my tripod and keep shooting.

For you left-brain photographers, I shoot at JPEG fine (large files), usually ISO 200 (unless I need to hand hold my camera in shaded areas--but never higher than 800); set on vivid color.

Here are just a few of the many images I got at the Denver, Colorado Zoo recently.

When shooting through glass, put your lens right up against the glass to eliminate reflections/glare.
Patience allowed me to capture him looking straight at me. 


A 200mm lens and patience was required to capture this hippo "posing" for me.
I spent at least 20 minutes photographing this hippo!


Patience. Patience. Patience. 

The action and movements were happening so quickly. I used my multiple-frames-per-second feature to 
make sure I got it just right. I liked this one for several reasons: You can see the dusting, the end of his trunk shows, there's a statue of a hippo in the background, and there are people walking around--an obvious zoo photo. And, yes, my camera on a tripod!

I hope I have given you some useful tips for you to go to your nearest zoo and have fun! Enjoy.

Tuesday, July 26, 2011

Photography: Same Subject, Different Renditions

My three years of majoring in art in college have had a strong influence in my photography. That is only one reason I refer to myself as a photo artist. There are three art forms in particular that have had an impact on me: Surrealism, Impressionism, and Pointillism. Sometimes, I will create two or three renditions of the same subject. Here is just one of many examples. You can find some my other Surrealistic and Impressionistic renditions on my website--www.elivega.net.

This example started as a "concept image," i.e., I had this concept in my mind to portray a scene that would allow the imagination to fill in the blanks; to complete the untold story. The story concept was a man and a woman enjoying a pleasant afternoon, talking, and sipping wine in the gardens. My concept included some key "props"-- a Wall Street Journal, a woman's hat, table and chairs, and, of course, a garden. 

 My first rendition I call, "Evening In The Gardens" © Eli Vega


  This is my Impressionism rendition, "Monet In The Gardens." © Eli Vega


  This is my Pointillism rendition, "A Tuesday Afternoon In The Gardens" © Eli Vega 


As Chic Thompson once said, "The mind is the birthplace of limitations." 


Tuesday, June 28, 2011

Arkansas: Do You See What I See?

Just sharing with all my newly published e-book about the beautiful state of Arkansas. I spent eight years, off and on, traveling throughout Arkansas--just me, my camera, and note pads. During those years I saw the natural beauty of Arkansas, discovered great places to visit, and met some great people along the way.

I have put all that together in a book that is a combination photography, travel guide, and human interest book which I entitled, Arkansas: Do You See What I See? You can order it through my website by going to my "Stock, Prices, Workshops" page, at www.elivega.net. 

Below are just a few of the 100 photo images I included in my book.  

                        There is a reason why Arkansas is called "The Natural State"

I love doors and windows. In my book, I talk about where
this great abandoned doorway is....

I have always included surrealism in my photo art.
This "see through" tree is one example of that...

West Mountain in the rain--Hot Springs

Note the flag. This was October of 2001


I have included some of these images on my website--Enjoy.

Eli Vega, Photo Artist
www.elivega.net
vegaphotoart@gmail.com

Tuesday, May 10, 2011

How To Photograph Butterflies

I don't live in the rain forest, so my favorite environment to photograph butterflies is at our local Butterfly Pavilion in Westminster, Colorado. They do a great job of replicating the butterflies' natural environment--dress lightly!

There are several concepts/principles to consider. I'd like to share a few with you. First, most, if not all, butterfly pavilions do not allow tripods--that will create some challenges for you! Let's assume, for the sake of these pointers, that you'll be doing your shooting with a hand-held DSLR or film SLR.

1) Shoot at wide apertures-- This will allow you to convert cluttered backgrounds into soothing backdrops. It will also allow you to shoot at higher shutter speeds to keep your images as sharp as possible. Depending on the position of the butterfly, I usually shoot anywhere from f/2.8 to f/8.
2) Use ISO 400-800 if you have to (and if your camera can still give you great images at those sensitivities)-- sometimes I just can't get a "safe" shutter speed shooting at ISO 200 and f/4.5.
3) Shoot a bright, colorful butterfly against darker backgrounds--they'll "jump out" at you in your images!
4) Watch out for "hot spots" in your backgrounds-- leaves and other objects brightly lit by the sun. They'll come out as large whitish spots in the background that will compete with your butterfly.
5) Don't always photograph the whole butterfly--sometimes close ups are just as interesting---abstracts.
6) Sometimes, if I just can't get close enough to one, I'll get as I can, then crop it later.
7) Remember this guideline, in order to keep your camera hand-held and still get decently sharp images:
Keep your shutter speed equal to, or greater than, the length of the lens you're using. Example: If shooting at 200 mm, make sure your shutter speed is approximately 250 or faster.
8) And, yes, photography is more art than science. There will invariably be that shot that, were it not for those distracting areas, objects, lights, etc. it would be a perfect shot. Sometimes a little "Ansel Adams" work in Photoshop might be necessary.

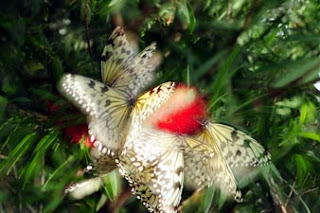
Here are just a few of my favorite butterfly images from my visits to our local butterfly pavilion.


                               Sometimes, I try some double exposures just for fun.

So, go out there and explore. Get mentally loose with it! And, don't forget the flora in and around those butterfly pavilions--they too make for some interesting, intriguing, and abstract images. Oh, and try some spot metering--great results!!

Enjoy!

Eli Vega, Photo Artist out of Colorado
www.elivega.net 


Monday, April 11, 2011

Sandhill Cranes in Southern Colorado

It's absolutely amazing to imagine how birds find their way through life. In this case, I'm talking about Sandhill Cranes, which migrate annually and spend weeks during their migration near Monte Vista Colorado.
          

Thousands of them stop at the nearby wildlife refuge just south of town to enjoy the marshes, ponds, wild grasses, and wide open spaces in the San Luis Valley (75 miles long!). They are a natural wonder to view and admire. And, for me, they make for great photo art subjects.

Here are some of my favorite images which I created in March of this year (2011). I wasn't just photographing birds; I was capturing their natural beauty, especially against such a great Colorado backdrop.

With Blanca Peak (over 14,000') in background.


Looking west from the San Luis Valley

 
                             It takes patience to wait for this type of courting display 
   

           In flight at sunrise, around 6:30 a.m.

If you go to Monte Vista next year during their annual Sandhill Crane Festival, make reservations early! It is definitely worth the drive, or flight. While you're there, take in the highest sand dunes in north America: The Great Sand Dunes, just a few miles northeast of Monte Vista.

Enjoy my photographic interpretations of the Sandhill Cranes.

Eli Vega, Photo Artist
www.elivega.net

Wednesday, March 2, 2011

I SEE SOMETHING™

People who know me well, who have attended my photography slide show presentations, or who have registered for my classes, understand that I am known for my I SEE SOMETHING™

I say it so much that it has become one of my trademarks. And it's true, when I go out "shooting" I always see something. But, it's not the same kind of seeing with which most people are familiar. I don't see with my eyes; I see with my imagination. I see something before I see it. It's kind of like that song says, "I knew I loved you before I met you." Okay, maybe it's not like that song....:-)

Here are just a couple of examples that illustrate what I'm talking about. I have other similar images on my website, but viewers don't know the story behind the images. But, for these two, I'm going to take you inside my head so you too can see what I see.

Imagine seeing several fully restored vintage tractors, all parked on this huge lot by a small two-lane highway. There are several makes and models, of different colors. And, they're for sale! "Tractors?" you say. "What tractor would be deserving of a photograph, unless it was for an assignment for some tractor or farming magazine?" Ah, but wait, grass hoppa, a tractor does have artistic value, if you see what I see.

I liked the combination of greens and reds. I was looking for an abstract. I could imagine what this extract might look like with very shallow depth of field (a wide f/stop). As I set my f/stop and manually and selectively focused, I saw this coming together. You see, it's not a picture of tractors; it's photo art that focuses on the art the tractors can create. It's there already, we just need to find it, i.e., create it.


I was strolling along one of my favorite places in Colorado--Pearl Street Mall in Boulder. On this particular day, I saw and studied one of several street performers, a small group of three guys singing and playing their guitars. They had a couple of back-up guitars which they had carefully placed behind them. In-between sets, I asked one of them if he would mind if I "took some pictures." He politely obliged. As I was photographing, I saw something that caught my eye-- a guitar lying on a bench, with a guitar case behind it. As I examined the developing scene in front of me, I started seeing with my imagination. They were no longer a guitar and a guitar case--I saw art. I began my experimentation with composition, depth of field, selective focusing, and a sense of creating a piece of art through my camera and lens. This is the result of what I saw.

Without a hint; without explanation of what went into this image, it takes awhile to see what you're seeing.


In both examples, there are several creative applications that serve as the foundation to "finding" these types of images. One of these applications is from my Eli's 5-Point Photo Art Model™  We need to detach ourselves from the symbols we have been programmed to see: "Tractors." "Guitar." "Guitar case." If we detach ourselves from the labels, we start seeing everything differently. Try it!


Eli Vega, Photo Artist
www.elivega.net


Monday, January 31, 2011

Snow Sculpture Championships: Breckenridge, Colorado 2011

This is my sixth year of photographing this phenomenal event. If you get a chance next year, I highly recommend it. The event draws international teams of artists. There is only one common denominator: All sculpture teams start with a 20-ton block of packed ice and snow, reaching a height twelve feet! From there, it's all individual creativity. It is absolutely amazing what the artists can create from a block of ice and snow. As Michelangelo once said, "I saw an angel in the block of marble and I just chiseled 'til I set him free."


I created several images of the event this past weekend, but only include a few here for your enjoyment.

These first two are from the snow sculpture "Freeze Frame" by the USA/Loveland, Colorado team. The sculpture faced in the direction of a clock tower in the town of Breckenridge. The design was that of a large 8"x10" camera. Inside the snow camera, the artists, true to the mechanics of such cameras, designed an inverted and upside down reflection of the clocks on the clock tower. Amazingly creative.

The spectators provide a good sense of scale.


 The backside of the camera was as if you could look inside the camera and see the inverted/upside down image.


"Marco" was by the USA team from Vermont. It is a sculpture of two boys in the water playing the game of Marco Polo. From this perspective, I took advantage of flare from the sun, which to me symbolized the boys having fun in the bright sunlight.

 
 "Medusa" was by the USA team from Wisconsin. How they managed so many smoothly curved areas throughout the large snow and ice area provided is beyond me!


"Mére De Nation" was by the Canadian/Quebec team.The stylized wedding dress "pays homage to the adventuresome young brides who crossed the Atlantic to marry the settlers of the St. Lawrence River Valley."

An added feature to this year's event was the addition of colored lights strategically placed and turned on at

twilight. It really added a nice touch to this sculpture, which was hollow inside.


"Spirits of the Aurora" was by the Canadian/Yukon team. It is based on the Aurora, or Northern Lights, which "are believed to be the torches held in the hands of Spirits seeking the souls of those who just died."It took second place this year.


After 2-3 hours of shooting, I took a much needed break. I went back to the event at twilight to continue my project. The inside of "Spirits of The Aurora" after the colored lights came on was a perfect opportunity to capture "the dead" in color.


And....drum roll please...............First place went to "Alebrije" (brightly colored Mexican folk art sculptures) by the team from Mexico.  The caption read, "Eagle-Sun; Jaguar-Rain and Snake-Earth are all dual mythological beings in Mexican culture. United in an Alebrije, it has the capacity to give life on earth." 


So, did I get you interested in Breckenridge's annual Snow Sculpture Championships? They're held the last week in January. Check it out next year! www.gobreck.com  


Thursday, January 20, 2011

Spring 4 1/2-Day Photo Workshop in The Great Smoky Mountains

Spring, believe it or not, is just 2-3 months away (depending on where you live). If you love photography, or photo art as I prefer to call it, I invite you to spend spring with me and David A. Dobbs (photographer out of Georgia) in the Great Smoky Mountains during a 4 1/2 day photography workshop. We will be covering both the technical and creative sides of photography through a series of workshop sessions, discussions, slide presentations, lots of in-the-field shooting, and a chance to receive feedback on your daily work from me and David.

If you're interested in learning more about this exciting, fun, and educational workshop, either:

1) Shoot me an e-mail and I will send you more information: vegaphotoart@gmail.com
OR
2) Visit David's website (www.dobbsphotography.com). He has more detail under "workshops."

I'll give you a preview: One of my workshops will be on Eli's 5-Point Photo Art Model

I'll leave you with a photo tip: If you take the labels off, you will begin to "see" differently. Think about this, for example: If it wasn't a tree, what would it be? Hmmm? 

Happy shooting!

Eli Vega, Photo Artist
www.elivega.net