Tuesday, March 17, 2015

REDISCOVERING SPOT METERING


Here's a theory: Could it be that the advent of photo editing software (no names mentioned) served as a "red herring" to throw photographers off their in-camera creative tracks? Another way of stating this is maybe, just maybe, some photographers learned photo editing software tools without having first learned their camera tools?

Regardless of where you stand on the question, let me take you back to an in-camera tool that can give us some great creative results. I consider myself an artist first--I devoted my new book, RIGHT BRAIN PHOTOGRAPHY (Be an artist first) to this concept. 

Now, let's zero in on what is called "spot metering." First, let me explain it. The built-in light meter in our cameras will give us what it thinks is the "correct" exposure. Most of us shoot in Matrix Metering mode, Evaluative Metering mode, or something similar. We do this because we want to get the best overall good exposure of the scene we want to photograph. We want everything in our viewfinder to be as well exposed as possible. We don't want an over-exposed or under-exposed photograph. Enter spot metering, a tool that allows us to create extremely creative images and disregards "correct exposure."

Spot metering helps me create an artistic, and more dramatic "look" to my images. As the term implies, when I set my metering mode to "spot," I am in essence telling my built-in meter to give me an exposure reading only on a very small part of the scene, anywhere from 1 percent to 10 percent of the scene, depending on the camera used. 

High contrast scenes are the most conducive for spot metering, especially if a particular part of the scene is the one I want to "stand out." The reason for this is that when my main subject is receiving a lot of light, and the background is subdued in dark shade or shadows, I can spot meter on my subject and make it "pop"--it will really stand out from the rest of the scene. I am, in actuality, being an artist--I am recreating what my eyes see; I am giving what my eyes see a different interpretation. I guess you could say I am translating the scene into my own language--the language of art.

Here are a few examples of what I have created with spot metering.     


The overall scene did not look at all like this. The contrast between the foreground leaves and the ones in the background was not this extreme. I made it appear this way by spot metering, or placing my metering spot on the brightest part of the leaf in the foreground. 
I prefer creating this type of dramatic effect with scenes like this, as opposed to ending up with the often "illustration" look of HDR where the scene has little to no contrast.


For this scene, I spot metered on the yellow tulip in the foreground, then set my exposure compensation dial to a +1/3 to add a little more light to the yellow tulips and the background. What adjustments I make, and to what degree, depends simply on what I want the scene to look like. There is no correct exposure; just the right exposure.


I was teaching one of my students spot metering when we saw this scene at a bar. It was a perfect setting to experiment with spot metering--the foreground was receiving a lot more light than the background. Based on the different levels of lighting between the foreground and background, I knew it would work nicely and that we would get a very dramatic effect. 


This spot-metered rendition has more mystery, intrigue, and is also more artistic than what the naked eyes saw.


So, if you have not experimented with this technique, read your camera manual to learn what you have to do to apply spot metering. Have fun with it. You will be like a child in a candy store-- you will want more, and more, and.....

Contact me if you have any questions or if you would like some 1-on-1 field lessons. I'll pick the spot. :-)                      www.elivega.net  

Sunday, February 22, 2015

PERSPECTIVE


Before I talk about this crucial factor in photography, what do you see above? 

You are looking at the interior of the Utah State Capitol dome. The smaller center circle surrounded by several smaller white circles is a giant chandelier hanging from the top of the dome! I placed my tripod about 18" from the floor of the rotunda, aimed straight up at the dome to get this shot. It looks one dimensional, but the dome is 285' from floor to the top. 


This is a short rhetorical survey. Let me see a "show" of hands: What percentage of all your images are taken from eye level, as you're standing up? Just as I thought.

Regardless of the percentage you came up with, I urge you to vary the perspective from where you get your shots. Look up, look down, get flat on your back or your stomach--whatever it takes to create more interesting, intriguing, appealing, and dramatic images.

Look at this next image. It's interesting--not a subject most of us see everyday. It's a scene depicting the history of mining in Colorado. 


Now, let's redo this one. What would I get if I got about two feet from the ground instead of eye level?


You can feel the strength, the power of the mining car from this close distance and perspective--I was looking up at it. You can still see the interesting faded walls of nearby buildings and what used to be a second-story door or window, but all from a different and stronger perspective. There is also less ground included in this image, which complements rather than take away from the cars. Additionally, this perspective creates the illusion that the tracks on the lower right go on forever. 


Look at this image above. Do you think it was easy or hard to get this one? Well, first, it was hard to see from where I was walking--along Bear Creek Trail near Telluride, Colorado.


My intuition led me to look on the other side of this large fallen tree. I'm glad I did. This photo demonstrates what I had to do with my tripod to get this shot. As you can see, because of the uneven ground along the trail, I had to alter my tripod setup to match the topography. Once I set up, I attached my camera to my tripod head, which was aimed straight down to get the image above. As you can imagine, I was bent over at a 90-degree angle. Whatever it takes.


So, next time you're out shooting, go ahead and get those eye-level shots--get it out of your system. But, before you move on, ask yourself if there is another perspective from which you can photograph the same subject. You will pleasantly surprise yourself. The more you do it, the greater your collection of more interesting images. 

Feel free to contact me if you have any questions about this topic. If you live in the Boulder/Denver area, call me and we'll do a 1-on-1 lesson, but from a different perspective. 


Saturday, January 24, 2015

HOW TO CREATE YOUR OWN STUDIO IN THE FIELD

Here's a common scenario. You see a subject really worth photographing, but the background is busy, distracting, and just plain ugly. You wish you could pluck your subject from its surroundings and take it inside a studio. Well, you can't do that, but you can create your own studio. Here is an easy and inexpensive way to create your own studio in the field. This ridiculously easy improvisation can transform your subject from common to uncommon; from less than mediocre to amazing. You won't believe how easy it is. People will think you have your own studio.


For this scenario, here is the problem.

Beautiful orchids, but not a good photo, right? The background is not only ugly, but it diminishes the beauty of the orchids. It competes with the orchids for attention.

Now, here is that simple solution.
Step 1. Buy a large piece of black velvet material. You can buy two or three different sizes so you can use with varying subject sizes. 3'x3' will work for this particular scenario.

Step 2. Just slide the black material right behind the flowers. The non-reflective black velvet will absorb light and virtually disappear. Sometimes, just a couple of folds will show, but it will add interest to the background.

Ready for the results? Voila!!


Can you believe these are the same identical orchids with the same identical background?

Some of my best and most unique images have been created with simple improvisations like this one.

So go out there and take your photo studio with you! Have fun.

If you have any questions about how some of my images on my website were created, just shoot me an e-mail and I'll get back with you.

www.elivega.net


Saturday, December 20, 2014


THE ROLE OF INTUITION IN PHOTOGRAPHY

I spend a lot more time in my upcoming book on this one topic. Some of us have that internal sense of intuition, that internal tug that tells us there is something over there, or over there. If that's not you, then think about this--next time you're out shooting, stop, just stop. Look around you slowly, left, right, around your feet, above your head. There is usually something there. When you stop, and use your imagination, you will not only look, but you just might see some hidden gems you hadn't seen before.

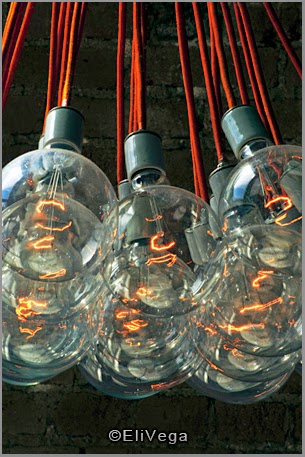
What do these three have in common: A flower arrangement, Taco Bell, and light bulbs? They were fodder for my right brain photography, after I followed my intuition that whispered, "You know, there might be something there. can you find it?" 
 

This is part of my right brain photography approach to photography. Let's start with this first of three scenarios. I was delivering a flower arrangement to a seriously ailing friend who was in an assisted living community. As I grabbed the arrangement from the backseat and started walking to the front door, my intuition kicked in and made me pause. I looked at the arrangement in my hands and realized I was holding on to a piece of art. I placed the arrangement on the parking lot, close to my car. I grabbed my photo gear and took out one of the props I carry with me-- a piece of black art board, which I used as my backdrop to separate this one flower from the others in the bouquet. The rest came easy.


I was walking along Pearl Street in Boulder, Colorado. In an old red brick building, I found a unique cafe/bar. There are a lot of cool, old, iconic buildings on Pearl Street. My intuition led me up the steps into the eclectic cafe and bar. It didn't take long to spot my photo trophy. I quickly asked one of the workers if it was okay for me to "take some pictures." I never "take" pictures, but say that to use the more commonly understood vernacular. After I got approval, I went to work, and created this. I was looking almost straight up to get this composition.


I got up early one morning while on a photo trip in Arkansas. In the small town of Russelville, I saw a Taco Bell as I drove down a narrow street. My intuition kept me from just driving by. Although it was just a Taco Bell, my intuition guided me to take a closer look. I saw something on one of the exterior walls, but didn't like the way the shadows looked that early in the morning. I decided to keep shooting around town for another two hours, hoping that when I returned, the shadows would look better. I'm glad I went back.


Intuition, if we listen to it, can guide us to spots, places, locations that, on the surface, may not even seem worth looking at---like a Taco Bell. Listen to it. If you don't think you've got intuition, do you ever get a gut feeling? Does your head suddenly turn to your right or left when you're out shooting? You might not know why, but follow those instincts--they're telling you something. Stop. Listen. Look. See. You might surprise yourself.   


Thursday, November 13, 2014

MAKING THE COMMON UNCOMMON--TAKE 2

This combined skill and ability in photography is worth repeating. During all my years of teaching photography, one of the disconnects I have seen is the one that exists between knowledge/understanding and skill/ability. For example, it's one thing for a photographer to say, "Oh, yeah. I know photography is art. I know all about interpreting versus documenting." I have seen the weak results of some of those who say they "know."

I can best explain what I mean by sharing a real life story. I was with one of my students in  the quaint town of Hygiene, Colorado. We were photographing in and around a shop where the owner paints and restores old farming equipment. As we were setting up one shot, my student pointed at something and said, "See that? You might think I'm weird, but I'm attracted to that." I told her, "No, I don't think you're weird at all." Then I taught her how to create art from something dull and mundane.

Below is what she was pointing at. Not pretty huh? I give her credit for thinking that this was cool. On the inside of this window was the owner's shop. He used a table platform to paint smaller pieces of farming equipment. Throughout the years, paint had splashed on the inside of the window and had dried. By shear coincidence, the splattering of paint had created some unique designs, shapes, forms, textures, and colors on this window. However, years of hot sunlight had taken its toll on the outside of these windows.

I could see the art that attracted my student. I taught her my CDE mantra, a formula I have followed for years. I first pointed out what Composition I thought would work best. Then I told her what f/stop would be enough for the needed Depth of field. I then showed her the third piece of the formula, which was critical for this particular scene--Exposure.  
   

Below is what the composition looked like before I taught her the E part of the formula. 
I liked the way the shapes and colors came together in the middle window pane. But, there was still a problem--the window looked dull with so much sunlight and grunge. The next step was to see what we could do to turn this interesting but still dull composition into something more interesting, maybe a piece of art.

I told Pauli we were going to intentionally under expose this image to make the colors "pop" and darken the background, using the exposure compensation dial, which most cameras have today. She was curious as to how much under exposure we needed. After a couple of test shots and making some adjustments, I concluded that by underexposing this scene by two complete stops we had created a piece of art. Two stops is the same as giving this scene 200% less light than the built-in meter thought I needed. Yes, 200%.

Both our images looked very similar. Pauli was so excited about her results that she posted her image on her Facebook page! This is my interpretation of the window above.


Here is the lesson, which I talk about in my workshops and upcoming book: I look with my eyes, but see with my imagination. If I only saw what my eyes looked at, I would have probably not photographed that ugly and dirty window. Best case scenario, I would have maybe photographed it, but would have ended up with the middle photo above. 

Seeing with our imagination means imagining what and how we can make anything look uncommon, no matter how dull or common. We can even make the sane insane.

Question: Without having read this blog, would you have guessed that the final image was just a dirty window?

So, go out there and see with your imagination! You might surprise yourself. Contact me if you would like to enhance your skills and abilities to create this type of photographic art.    

Saturday, October 18, 2014


CONVERT BACKGROUNDS INTO BACKDROPS    
 
Do you ever wonder how professional photographers get those nice soft and blurred backgrounds? Well, you don't need to apply photo editing software tools after the fact--that doesn't require photography skills. You can create what I call "backdrops" easily, in camera!   
 
All you need to do is understand some key concepts regarding f/stops, those numbers like f/2.8, f/8, f/16, f/22, etc. F/stops, as you might know, are used to control for depth of field. In other words, by understanding how f/stops work, we can either get everything sharp (in focus) from the closest subject to us to the farthest subject from us, OR, we can decide to get only the closest subject(s) from us sharp and blur the background.

There are two basic concepts to understand. I go into detail in my upcoming book, RIGHT BRAIN PHOTOGRAPHY, but for now this is all you need to know to create your magic in camera.

Concept #1: The larger the f/stop number (f/16, f/18, f/22, etc.), the smaller the lens opening (diaphragm), therefore MORE depth of field. More depth of field means more subjects, from closest to farthest, will be in sharp focus.
Concept #2: The smaller the f/stop number (f/2.8, f/4, f/5, etc.), the larger the lens opening, therefore LESS depth of field. Less depth of field means fewer subjects, from closest to farthest, will be in sharp focus.

Now are you ready for some visual examples? This is what you will see when you apply these two basic concepts. Please don't try to memorize rules. It is more important to understand concepts. By understanding concepts, you can apply the same concept to any scene you run across! If you try to understand rules, you will always be asking, "What f/stop should I use?" Know the power of understanding concepts.

Here is what happened when I applied these two concepts.

In this first image, I focused on the closest subject, with an f/stop of f/22. Read concept #1 above. Not only was my main subject, those red autumn leaves in the foreground, in focus, but also some of the background. In other words, my background is not blurred enough and therefore distracts from the leaves in the foreground. The background "competes" with the foreground for attention.
 
 
This is what can happen when you rely on your camera to auto focus for you. The camera, no matter how expensive, cannot think for you. It doesn't know what you want. In this case, the camera randomly focused on the background. Although this image was also shot at f/22, it was not enough to render both the background and the foreground leaves in sharp focus. In fact, my main subject, the leaves, are out of focus!! That's not what I wanted.
I bet you've seen this before in some of your photos, right?


Okay, let's try this again. What I wanted was to blur the background. This time I focused on the foreground leaves and used an f/stop of f/5. I chose that f/stop for this demonstration because most lenses allow you to use at least f/5, or something close to that. So, how did I do? Well, this time, my leaves in the foreground, especially that first one, are in focus, AND I got a nice blurred background. Re-read concept #2 above.
 
 
See how simple it is to get it right at the time, in camera? So, go out there, apply these two basic concepts and have fun with it. If you do it right, your family and friends will ask you, "Did you take that?"    


Wednesday, September 17, 2014

MAKING THE COMMON UNCOMMON

This tip on extracting the uncommon from the common is a preview to what you will read in my upcoming book, Right Brain Photography (be an artist first). It begins with understanding that when viewers see our photography, our art, they were not there. We can take advantage of that obvious fact. Given that advantage, we can create illusions. When people see our images out of context, they will try to fill in the blanks: What am I looking at? What's happening here?

There are several key points which I go into detail in my book abut making the common uncommon. In this piece, however, I will just summarize some of the key elements. It begins with not just looking at what our eyes see, but also what they don't see. To accomplish that requires some creative photography detective work. 

Here is a real-life scenario. I was on Pearl Street Mall in Boulder, Colorado. I was among several admirers who were impressed with a musician who used wine glasses to create classical music, like Mozart's compositions. I asked him what he called his instrument, the glasses. He said this form of music is over 300 years old and the instrument is called a Glass Harp.

So, from a photography perspective, here is how I got from here to there. I first befriended him, asked questions about his art, and complimented him on his unique music. I also dropped a tip in his jar. Once I broke the ice and felt a sense of comfort and trust, I started shooting from different perspectives. The key camera features and photographic principles I was constantly focusing on included: lighting, necessary f/stops, shutter speeds, ISO, and exposure compensation. It was one of those rare moments when I did not use a tripod, to  allow me the freedom to quickly adjust my perspectives. I used ISO 640 in order to get fast shutter speeds, which compensated for not using a tripod.

Let's start with what I saw with my eyes. This is a good photo, but just a simple snap shot.


Now, here are three variations of those glasses. I was no longer photographing "glasses." 
I was looking at form, shapes, color, light, etc. Try to imagine what you would have thought if you had not seen the photo above.

Seen out of context, these glasses seem to go on forever--that was the idea. It is also impossible to know where these glasses are and why there are so many of them.

For this one, I included the human element. Including the hands in the image adds mystery because the viewer doesn't know why those hands are there or what they're doing. I intentionally added the larger glasses in the foreground in this photo, and the one above, to add a touch of mystery and perspective.

I chose a horizontal for this one, to draw attention to the larger glasses in the foreground. This perspective also picked up several colorful reflections, which, again, add that touch of mystery--what am I looking at? What is that bright orange-like area between the two larger glasses?


So, next time you come across a group of glasses, ask yourself, "Besides glasses, what else do I see?" How can I make the common uncommon? Exercise your right brain.