Saturday, April 19, 2025

 Wide-angle and Telephoto Lenses

All of us shoot with our lenses set at various focal lengths. This month, I am covering the two extremes: wide-angle and telephoto focal lengths. By wide-angle, I mean the 10mm-28mm focal length range. By telephoto, I mean any focal length 70mm or larger (100, 200, 300+). 

I will share my perspectives on three variables: focal length characteristics, uses, and caveats.

Let's start with wide-angle lenses. One of their best characteristics is that they inherently have more depth of field at any given f/stop, as I will demonstrate below. They are great when shooting indoors in tight spaces, like inside a grand cathedral. Depending on the focal length, we can include the ceiling, pews, and the stained-glass windows on the left and right walls. That's pretty awesome! 

However, there are some caveats. The more we tilt our cameras upward, the more those parallel wall lines converge on you! The left and right walls will seem like they're leaning in. Not good. To counteract that, I raise my arms above my head, using my tilting back screen, so I don't have to tilt my camera so much. Of course, with my arms up like that, it's hard to steady my camera. Solution? Increase my ISO, say, from 100 to 400 or 500, to get a faster shutter speed. Voila! 500 ISO is still good enough in today's cameras to minimize "noise." Another great use is when we have a huge natural formation or mountain in front of us, we want to get the whole subject in, but we can't move farther away to get the shot. No problem! Click.

Telephoto lenses.The best characteristic is that, at any f/stop, they have wider apertures. The size of their apertures/openings are larger than other lenses, at any given f/stop setting. What this means is that we can get those nice, blurred backgrounds behind our subject, which makes our subject "pop," or really stand out. They also give us much narrower coverage, which helps us to isolate our subject from the rest of its surroundings. One other great advantage of telephoto lenses is what's called "The illusion of compression." Elements in our scene appear as if they are much closer to each other than they really are, and that makes for some great dramatic images! 

I have one strong caveat regarding telephoto lenses, and this one is extremely critical if you take photographs without a tripod. Remember: While they magnify the size of your subject, which is great, they also magnify any slight movement in your hands! Any slight hand movement will blur your subject. That's the bad news. However, there is a good trick to avoiding that problem, in addition to today's vibration control features. Make sure your shutter speed is equal to or greater than the focal length you have set. For example, if you are shooting with your focal length set at 200mm, make sure you are shooting with a shutter speed equal to or greater than 1/200th of a second.  

Before I show you some examples of how all this looks in real life, let me demonstrate two good scenarios that illustrate two characteristics of these two focal lengths: The visual effects of the size of the aperture/opening and the "illusion of compression."

Below are two side-by-side, identical images, one shot with a wide-angle lens; the other with a telephoto lens. They were both shot at f/16, both shot from the same distance, and the focus point was the same--that foreground tree on the right. The only difference was the choice of focal length. 18mm (small aperture size) v. 200mm (large aperture size). Notice the difference in depth of field.  

As you can see, the image on the left has lots of depth of field when shot with the lens set at 18mm. The image on the right, shot with the lens set at 200mm, has an extremely blurred background, even though the f/stop was at f/16. 


Now let's look at how the "illusion of compression" looks in real life. The image on the left reflects how this scene looks to the naked eye, when we stand there and look at Garden of the Gods in Colorado Springs, Colorado. The distant snow-capped mountain is Pikes Peak. As you can see, it is quite a distance away. The image on the right was shot with a telephoto lens. Notice the "illusion of compression!" Pikes Peak, the in-between mountain range, and Garden of the Gods seem much closer to each other than they really are. The result? A more dramatic image. 


Okay, now I am ready to show you some examples of what I have captured through the use of wide-angle and telephoto lenses.

In order to capture downtown Nashville, Tennesse, standing just across the nearby Cumberland River, I had to resort to a 28 mm focal length. The viewer doesn't realize that the 33-story building on the left looks really big in real life. That's the beauty of a wide-angle lens. We can get "the whole thing in."   


This image is of a large Catholic Church. Again, when viewers look at an image like this, they don't realize the expanse of this interior. It took a focal length of 10 mm to get what you see here.


I photographed this artist at work for a commercial project. I didn't want just a portrait shot. I wanted to get close to him, but at the same time, capture the environment in which he works. In this case, his studio. I was able to do that with an 18 mm focal length. 


This double arch in Arches National Park is huge! When I got up close to it to clearly see both arches, I realized I needed to grab my wide-angle lens. 17 mm worked just fine for this project.


If we get too close to an animal, bird, or butterfly, we invade their comfort zone. The chances are high that we will spook them, and they will change their position, run away, or fly away. Enter telephoto lenses. We can get our shot by keeping our distance. With telephoto lenses, we don't need to get close to them; we bring them close to us. The next image is evidence of that. I shot this beautiful peacock at a distance, with a 300 mm telephoto. I simply cannot get these shots by moving closer to my subjects.


I also used a 300 mm focal length to get this downtown Denver shot. I was several blocks away from downtown. Notice the "illusion of compression" of those buildings. Those buildings look as if they are touching each other, again, creating a more dramatic image. 


For this far-away heron, I used a 400 mm focal length. I guess you can say that telephoto lenses also give us the illusion of closeness. I was a good 75-100 yards away from it, but it appears as if I was a lot closer. Luckily, it was a nice, clear day. When there is a lot of atmospheric moisture or haze in the air, a strong telephoto lens will record that, diminishing the sharpness of our images. 


So, go out there, pick your subject, and experiment with wide-angle and telephoto lenses. Have fun!

Contact me if you would like a field lesson, a 30-minute ZOOM lesson, or if you have a question.
vegaphotoart at gmail com          www elivega net


Thursday, March 13, 2025

 PHOTOGRAPHING HORSES


I love photographing horses. They are beautiful animals and so graceful. I like the way they respond to the human touch. I prefer to photograph them like I would a person--in their environment, and often just doing what they normally do. Sometimes I photograph only one horse; sometimes a few in the same scene. Whatever approach I take, I want to capture their natural beauty.

I usually use a telephoto focal length to keep my distance. Keeping my distance assures that I capture them doing their thing, so to speak. 

Here are a few examples I'd like to share this month.


I'll start with these beautiful horses surrounded by natural yellows--I believe they're called Goldenrods. The horses were grazing as I photographed them, but I wanted a more personal touch.  I didn't want to spook them. It occurred to me to simply snap my fingers to get their attention. It worked! I was pleasantly surprised. In a split second, they all lifted their heads and turned to look at me. Click.


I saw these other three horses in the dry high plains in Colorado. It's not just the horses, but their context that attracts me. In this case, the desert-like background. They were at the foothills of these mountains. I was actually looking up at them.


One early morning, I saw a herd of horses on a ranch. And then one of them slowly inched away from the rest. I liked the lighting on her, as well as the backdrop. But I needed more. I patiently waited until he flipped her tail. Click! I always have my camera set on fast continuous shooting in case I encounter these situations. As soon as I saw his tail move, I rattled off several quick consecutive images.


Leroy. One of my former students and her husband ran a small ranch in Colorado. I asked her if I could come by and photograph their horses. She and her husband kindly treated me to breakfast before I started shooting--photos, that is. They kindly orchestrated the shots I wanted. This one is of Leroy galloping in one of their wide-open spaces.

My shutter speed was set at 1/320, to capture detail on Leroy. I had my camera on my tripod, but loose so that I could pan my camera as I followed Leroy galloping. Panning is a cool technique because as I pan (or move) my camera to mimic the movement of the horse, the background "moves" in the opposite direction.

It wasn't until I saw the image on my computer screen that I realized Leroy had a chunk of grass in his mouth as he galloped! Too funny. 


And then there is this "Brotherly Love" image. Even horses share emotional gestures.


I also like horses engaged in official competitive horse races. There is an official racetrack, Oaklawn, where I live in Hot Springs, Arkansas. The key photographic components to photographing horses flying fast across the plane of view are exposure and shutter speed. I always take test shots to make sure I have my exposure right. I do this by aiming my camera, more or less, where I am going to aim it during the race. I set my focal length as well. I like to leave myself extra space because I won't know for sure how many horses will be in view as they are running across. At the same time, I make sure I have a fast shutter speed set, anywhere from 1/500 to 1/2500.

With that introduction, let me share a few horses at the races. Betting is allowed. 😁   


This one is after the race, with the beautiful horse, the jockey, and an assistant watering the horse down after the race to cool the animal down after a fast race. 


So, if you like horses like I do, go out and find some--they're out there. And, don't hesitate
to ask the owners permission to stage some shots or simply photograph them doing what they naturally do. Enjoy!


Tuesday, February 18, 2025

DOORS AND WINDOWS 


Doors and windows draw me in, especially those attached to abandoned houses and buildings. They speak to me. They beg questions. Who lived there? What was their lifestyle like? What did they see when they opened that window or door?

The technical side of photographing these subjects is quite straightforward. Composition-wise, I am simply photographing a door or a window and not much else. As for depth-of-field (f/stops), doors and windows don't have much depth-- f/8 and go for it. In other words, you don't have to fuss much about what f/stop to use. You definitely don't need a high f/stop (f/10 or higher). As for exposure, I prefer matrix metering, or evaluative, or entire scene, depending on your camera manufacturer. If the exposure is off a bit, I rely on my exposure compensation dial to fine-tune my exposures in-camera.

Where do I find interesting doors and windows? I love taking the "blue roads" on a map--those narrow two-lane highways off the beaten path. Every time I enter a town with a population of 2,000 or less, I will slowly drive into or walk into backways and alleyways. Sometimes I will also go down those dirt roads in the county to look for abandoned buildings and houses. And sometimes they're right off the highway! On a side note, I love going into any small local cafe to have breakfast or lunch-- it's a sociological experience.

Speaking of sociological experiences, I was at the check-out counter in one of those local cafes when I spotted a sign behind the cashier that read, "Nothin' much happens in a small town, but the rumors sure make up for it."

Okay, with that introduction, let me share some of my favorite doors and windows.

The first two were not on abandoned buildings, but they got my attention, nonetheless. This door was a side door on a Catholic church in Waco, Texas. The color, shape, and simplicity gave me a sense of calm and tranquility. I also noticed there was no doorknob, which added mystery. You can't get in? You can't get out? 


I found this other intriguing door on a Spanish mission in San Antonio, Texas. It was part of the Concepcíon Mission, which is on the Mission Trail in the city. Only one of the doors was open, pulling me toward a spiritual candle on the wall inside, as if saying, "You are welcome here." What is your interpretation?


This window looked like a framed painting. It was an apartment in an old building in the old mining town of Victor, Colorado. In lieu of curtains, someone just placed a colorful sheet on the window. 


This reminds me of The Eagles' song lyrics, "You can check out anytime you like, but you can never leave." 


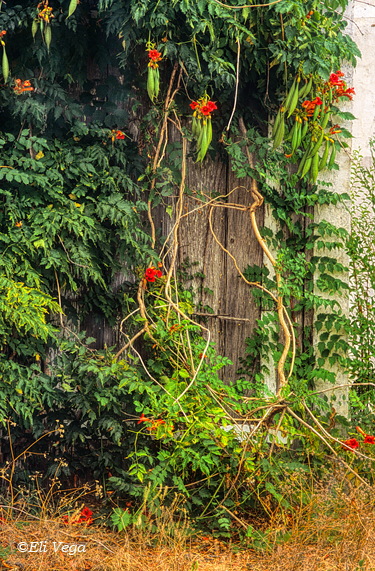
This door had succumbed to nature in Broken Bow, Oklahoma. There was not much door to see. I wonder how long it took Mother Nature to take back what humankind had left behind.


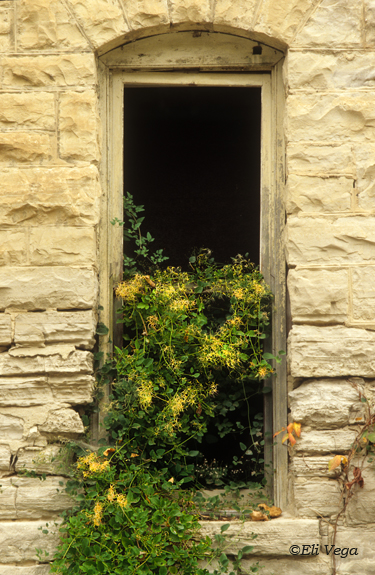
Nature had also started to overcome this window. The window was high from the ground, so you know that the encroaching plant was tall. It seemed to decorate that now unattractive window. Check out that stone exterior. 


Now, this one has humor built into it. At quick glance, this doesn't look like a door on an abandoned house. Someone got creative and, on a large piece of plywood, painted a silhouette of a cowboy carrying a saddle. Then the big chunk of plywood was nailed from the inside to cover the doorway. 

This door, found in Marble, Colorado, was the most creative door I have ever photographed. Those thin shapes you see above the cowboy are icicles. It was a very cold winter day.


I love this door with a transom window above it. It looks so weathered and tired. Those random wires seem to be yelling, "We're free!." As ugly as this door is, I love the colors on the brick and wall underneath. It's so ugly it's beautiful. 

I found this scene in an alley in the small historic, highly visited, town of Jefferson, Texas, near the Louisiana border.  


I found these windows in St. Joe, Arkansas, along Highway 65. I don't believe this building is even standing anymore. In my Right Brain Photography classes, which piggyback on my book by the same title, I talk about the concept of impermanence. If you see something interesting, take it before it's gone! That goes for life as well. Nothing lasts forever.


This is my last example. This door was once part of a thriving motel. Why the exterior wall was painted half red and half pink, I have no idea, but I'm glad it was. It was so surreal. Oh, if those walls could talk.


So, look for a state road map of your choice, look for those small towns, and start driving. Use those unique town names as your "GPS"-- like Marble, St. Joe, Coffee, Broken Bow, or Muleshoe. And, be sure to have breakfast at one of those quaint cafes, like "The Roundup, "Mudhouse Cafe," etc. 


Tuesday, January 21, 2025

SUNSETS AND SUNRISES 

What's not to like about sunsets and sunrises, right? We get awesome colors, drama, and even mood. Now, we do have to get up extremely early for those once-in-a-lifetime early moments, but it's worth it!  

I don't necessarily have to include the sun itself setting. Sometimes I prefer those subtle tones and hues that invoke moods of peace, tranquility, and even spirituality. They elicit ethereal emotions.

The colors and high-contrast lighting do pose challenges. Luckily, there are a few solutions to those issues. One of those solutions is HDR, or the combining of 3-7 images taken at different exposures and combining them in HDR software. I try my best not to rely on HDR, but when I do need it, my goal is for my images not to look "HDRed." None of the examples I will share are HDR-created. 

Another solution I use is to use my exposure compensation dial to get the range of lights and shadows to a point that diminishes the need for HDR and just do some fine-tuning with my photo editing software. Yet another technique I use is timing, i.e., study the scene and wait to "click" when the dynamic range is the scene is roughly within 8-10 stops. Obviously, that is based on an estimated sense of when that moment is right. But, with plenty of practice and trial-and-error, that has become an easier task.      

With that introduction, let me share some of my sunsets and sunrises.

I saw this fisherman in White Rock Lake in Dallas, Texas relaxing and enjoying his early morning fishing. The atmospheric conditions that day were such that the sun was not "blown out." And, yes, there are shadows here and there that would bother HDR enthusiasts. But I like shadows in some images. They create interest, mystery, and mood. Without them, this image would be a documentation of a man fishing. Instead, the lighting translates that feeling of fishing in an early quiet, calm morning. 


There was a lot of new freeway construction happening around the city. One day I noticed a particular part of the construction. It included the construction of a second-level curved overpass. For me, I saw curves, lines, and geometry. My imagination saw early morning vibrant colors. That was it! I had a plan. I went to that spot one early morning and saw what I envisioned. I put on my FLD filter to enhance the colors. FLD filters were used during film days to correct for White Balance when shooting indoors, without flash, in fluorescent-lit venues.

Photography requires skill, planning, and a little luck. I had planned the timing of this shot and I had the skills. But, as luck would have it, as I set up my equipment for the shot, I noticed two men climbing the scaffolding. I decided to wait until they got to the top, to see what would happen. They walked along the construction when one of the guys got down on his knees to inspect something. Click! 


One early morning, I drove along a two-lane highway toward southern Missouri in search of historic grist mills. As I drove over a large hill, I noticed the sun coming up over a foggy valley. I quickly stopped, turned around, and parked at a safe spot. I hiked to the top of the hill and was met with an awesome sight! I felt so calm and tranquil, but I wasn't capturing what I felt. I changed my White Balance to Fluorescent to see if it would give me the colors that matched my feelings. Voila!
I set my f/stop to f/25, which gave me that sunburst.  


Whenever I walk or hike with my camera, I periodically turn around to see how things look behind me. Such was the case one early morning as I walked along a dry riverbed looking for a good morning shot of downtown Fort Worth, Texas. Wow--I'm glad I did. I put on my FLD filter and got this spiritual-looking image.


Well, since I'm on the subject of FLD filters, I'll throw in one more. This time, I got my shot before I could see the sun above the horizon. Again, with an FLD filter, I got this soothing quiet image of the Red River in far north Texas near the Oklahoma border. I loved the early morning reflections. The lack of HDR creates images with little detail. I like that. Shadows, and a lack of details, creates interest and curiosity, and also adds mood to my images.   


In quaint Eureka Springs, Arkansas, there is a giant statue of Jesus. It is called "Christ of the Ozarks." It is claimed to be the third tallest in the world, at 65' 5.5." I photographed it from behind at sunset because I liked the silhouette effect.


This is a small canyon, Eldorado Canyon, near Boulder, Colorado. I got up early to see how it would look. I was lucky that morning. The clouds really enhanced the final image, giving it a mystical glow and added drama to the sky.


This is a different kind of sunset. I was at the Colorado Railroad Museum in the late evening, just before they closed. Photographing railroad cars, equipment, and hay at sunset took on a different appeal.


So, as you can see, there are a lot of different subjects and scenarios that lend themselves well to sunset and sunrise images. Don't limit yourself. Get up early, or stick around until sunset, and experiment with exposure settings. And don't forget to use your exposure compensation dial.

Have fun. E-mail me a couple of your favorites! 


Eli Vega, Photo Artist
vegaphotoart@gmail.com


Wednesday, December 4, 2024

 CAMERA  & LENS MOVEMENT


Obviously, not all subjects are conducive to this technique. However, when applied and works, you can get some very cool creative, unique images. 

Sometimes, I just have a gut-level feeling that it's going to work. At other times, I need to take a test shot or two before I go for it.

In terms of moving my camera, in some cases, it works best by taking my camera off the tripod. By "movement" I mean that I move my camera either downward, to the left or to the right. When it comes to lenses, I'm referring to either zooming in or zooming out. With all these possibilities and options, I shoot with a slow shutter speed. In most cases, I'm talking about 1/6th to 1/15th of a second. Those shutter speeds allow me to record the movement. If I move too slow all I get is what appears to be an out-of-focus image. If I move too fast, I just get a big blur of color. It takes practice and at times two or three tries to get what I want. I only have one image to share where the shutter was 15 seconds, but that's an exception and I'll explain in more detail below.

Another key consideration is the type of focus setting. Depending on what I am trying to achieve, sometimes it works best if I set my camera/lens on manual focus.


The minute I noticed we were having a good rainfall, I headed downtown. I wanted to capture umbrellas, hoping for some big ones and colorful ones. I got under an awning with my camera and tripod to see what I could find. And I found this. I simply followed the movement of these friends as they hurriedly crossed the street with his umbrella. One-sixth of a second to capture the movement.


For this image, shot the same day as the one above, I moved my camera downward to get this effect at 1/4th second.


I spotted these tiny white flowers up in the mountains. They didn't seem like much at a glance, but I decided to do some of my right brain photography magic and made them "move." My camera was on my tripod, but I loosened the head so I could move my camera to the left during a 1/5th of a second exposure.


It took some careful and calculated setup for this one. I was with a former student, the owner of this beautiful instrument. We propped the bass up, secured it steady, and placed a large black piece of material behind it. I also changed my White Balance to Florescent because of the lighting in his basement. I knew what I wanted to do. I set my camera for manual focus and set my shutter to 15 seconds. I needed that time to apply my "Zoom-n-stop" technique, which I discuss in my Right Brain Photography book. During those 15 seconds, I clicked the shutter, waited a few seconds then zoomed in. I waited a few more seconds then zoomed in again. Waited a few more seconds then zoomed in. I did that three times until my 15 seconds were up. Voila! 


I was teaching one of my 3-day field workshops at Rocky Mountain National Park. Among the several techniques I taught that day was camera movement. For this this scene I slowly moved my camera downward. I always start from above the middle and then move slowly downward during a 1/15th of a second exposure. The results look very impressionistic.


I also moved my camera downward for this next shot but got a totally different effect due to the subject, lighting, and time of year--autumn. Coincidently, this was also at 1/5th of a second. The aspens seem like they're on fire. 


I simply zoomed in slowly for this shot. The subject lent itself well for this zoom-in technique.


It was an early foggy morning. I loved the mystery of this scene along a country road in northern Arkansas. I moved slowly forward for this one during a 1/13th of a second. It has the characteristics of Impressionism.


I hope this has motivated you to go out and experiment with camera and lens movement. Remember, you will need slow shutter speeds. Take some exposure test shots first to make sure your exposure is to your liking before you start moving or zooming. 

Have fun and let me know if you would like an in-person or short ZOOM lesson.    


Sunday, November 3, 2024

PHOTOGRAPHING WATERFALLS 


It would be more appropriate to think of what we do with waterfalls than how we photograph them. 

Composition is critical to me. What, besides the waterfall, will I include in my image?

Translating a feeling or sensation. How can I translate "tranquil" or "peaceful" into something we call a photograph? 

Is the image more powerful in color or black & white?

Do I want to freeze the waterfall or do I want to slow it down to a dream-like state?

Perspective. Where is the best spot to be when I photograph the waterfall? Do I want to shoot at eye level, or below eye level? From over there or over here? Which best captures what I have in mind?

If possible, I prefer to photograph waterfalls under overcast skies, to reduce glare, flare, and high color and light contrast. 

These are all variables I consider before I get my equipment and start shooting. 

With this introduction, let me share some of my waterfall images and some behind-the-lens details.  


Multomah Falls in Oregon is gigantic--620 feet tall!! If you photograph the entire falls, you lose its power and grandeur. I photographed the lower half of the falls to capture its context; its surroundings, whie at the same time capturing its power and beauty. A wide-angle lens is definitely the tool to use, especially when you get this close to it. 


Lower Yellowstone Falls, in Yellowstone Park, Wyoming. For decades, I had heard of it. I had seen photos of it. But, I knew it had to be awesome. Finally, I got the chance to see what I could do with it. I have several images of it, but I decided to share this one. For this image, I came to the conclusion that it looked stronger; and more powerful in B&W. 


Ouzel Falls is in Rocky Mountain National Park. It takes a good two-three-mile hike to get to it, at an elevation of over 9,000.' I got several photos of it. But when I was done, I wasn't satisfied. Looking up at it, I felt its powerful presence, but I also felt at peace. Tranquil. I wanted to translate that feeling. I walked around some huge boulders to get a closer view of the bottom of the waterfall. That's where the magic was. That's where "peace" and "tranquil" were. With a slow shutter speed of 1/6th of a second, I got my translation. 


Sweden Creek Falls in Arkansas is a hidden gem. You have to drive the backroads to get to it. I was having lunch at a local cafe when I saw one of my former students. It had rained a lot that day and she told me that they had just been to the falls and recommended I go there. Due to the rain, it was flowing. I took her up on it and rushed out there after lunch. She was right, it was flowing!


Lake Catherine is not far from where I currently live. A short hike near the lake takes you to Falls Creek Falls. As with most falls, the timing is most important, as with Sweden Creek Falls. I like the rugged topography surrounding the falls.


Another great area near home is Garvan Woodland Gardens, a favorite spring and fall photo-takinig location. Here are two of the three waterfalls in the park. 


Again, near me, just about two miles away, is an area called Stone Bridge. The dam south of the large pond offers great photo opportunities after a good rainfall.


Fish Creek Falls is my favorite waterfall in Colorado. It is a few miles outside Steamboat Spring, near the Wyoming border. When it rains, it pours! 


So, research your surrounding areas, within a days drive from you. Are there any waterfalls worth visiting? If not, maybe you'll find some waterfalls on your next weekend trip or vacation. Whenever it happens, have fun with them. I find them soothing, relaxing, and, of course, awesome to photograph. Enjoy.

Feel free to contact me anytime:   www.elivega.net     vegaphotoart@gmail.com